Wednesday, 25 January 2017

[IdiotEngine] 01: GotG Star-Lord Bag Buckle 3D Modelling

Recently I began working with my friend JD on producing custom 3D models for his up-and-coming, previously one-man props, replicas & custom hero suits company, known as IdiotEngine; best known for its high quality handmade superhero suits and well realised prop reproductions, which are all created with a meticulous eye, as if a love letter to the characters and companies JD loves so dear. 

I recently 3D modelled the Star-Lord sling bag buckle for JD's personal project, for which he's building his own Star-Lord cosplay/costume, complete with helmet, headphones, jacket, 3D prints of Star-Lord's gun, bag buckle & the Infinity Orb, as well as handmade boots, Star-Lord sling bag, and 
custom Sony Walkman.

Smoothed buckle orthographic views

Buckle wireframe-on-shaded orthographic views

A collection of buckle modelling screenshots

Star-Lord buckle Influence Map / rough orthographic guide

Having an experienced 3D modeller on the team has begun to allow JD to even further expand upon what he is able to produce, especially in the case of 3D printed objects that would be far too time-consuming for him to sculpt entirely by hand. Of course, having a plain 3D printed object is one thing, but the sizing, sanding, smoothing, painting and in the case of fabric/leather-based props, stitching and weathering of the object is a whole other story. Thankfully, however, JD has had a passion for the handmade since a child, and is hoping to make IdiotEngine an official full-time production in the near future. Next up will be modelling some of the components of Star-Lord's headphones, before moving on to potentially larger builds.


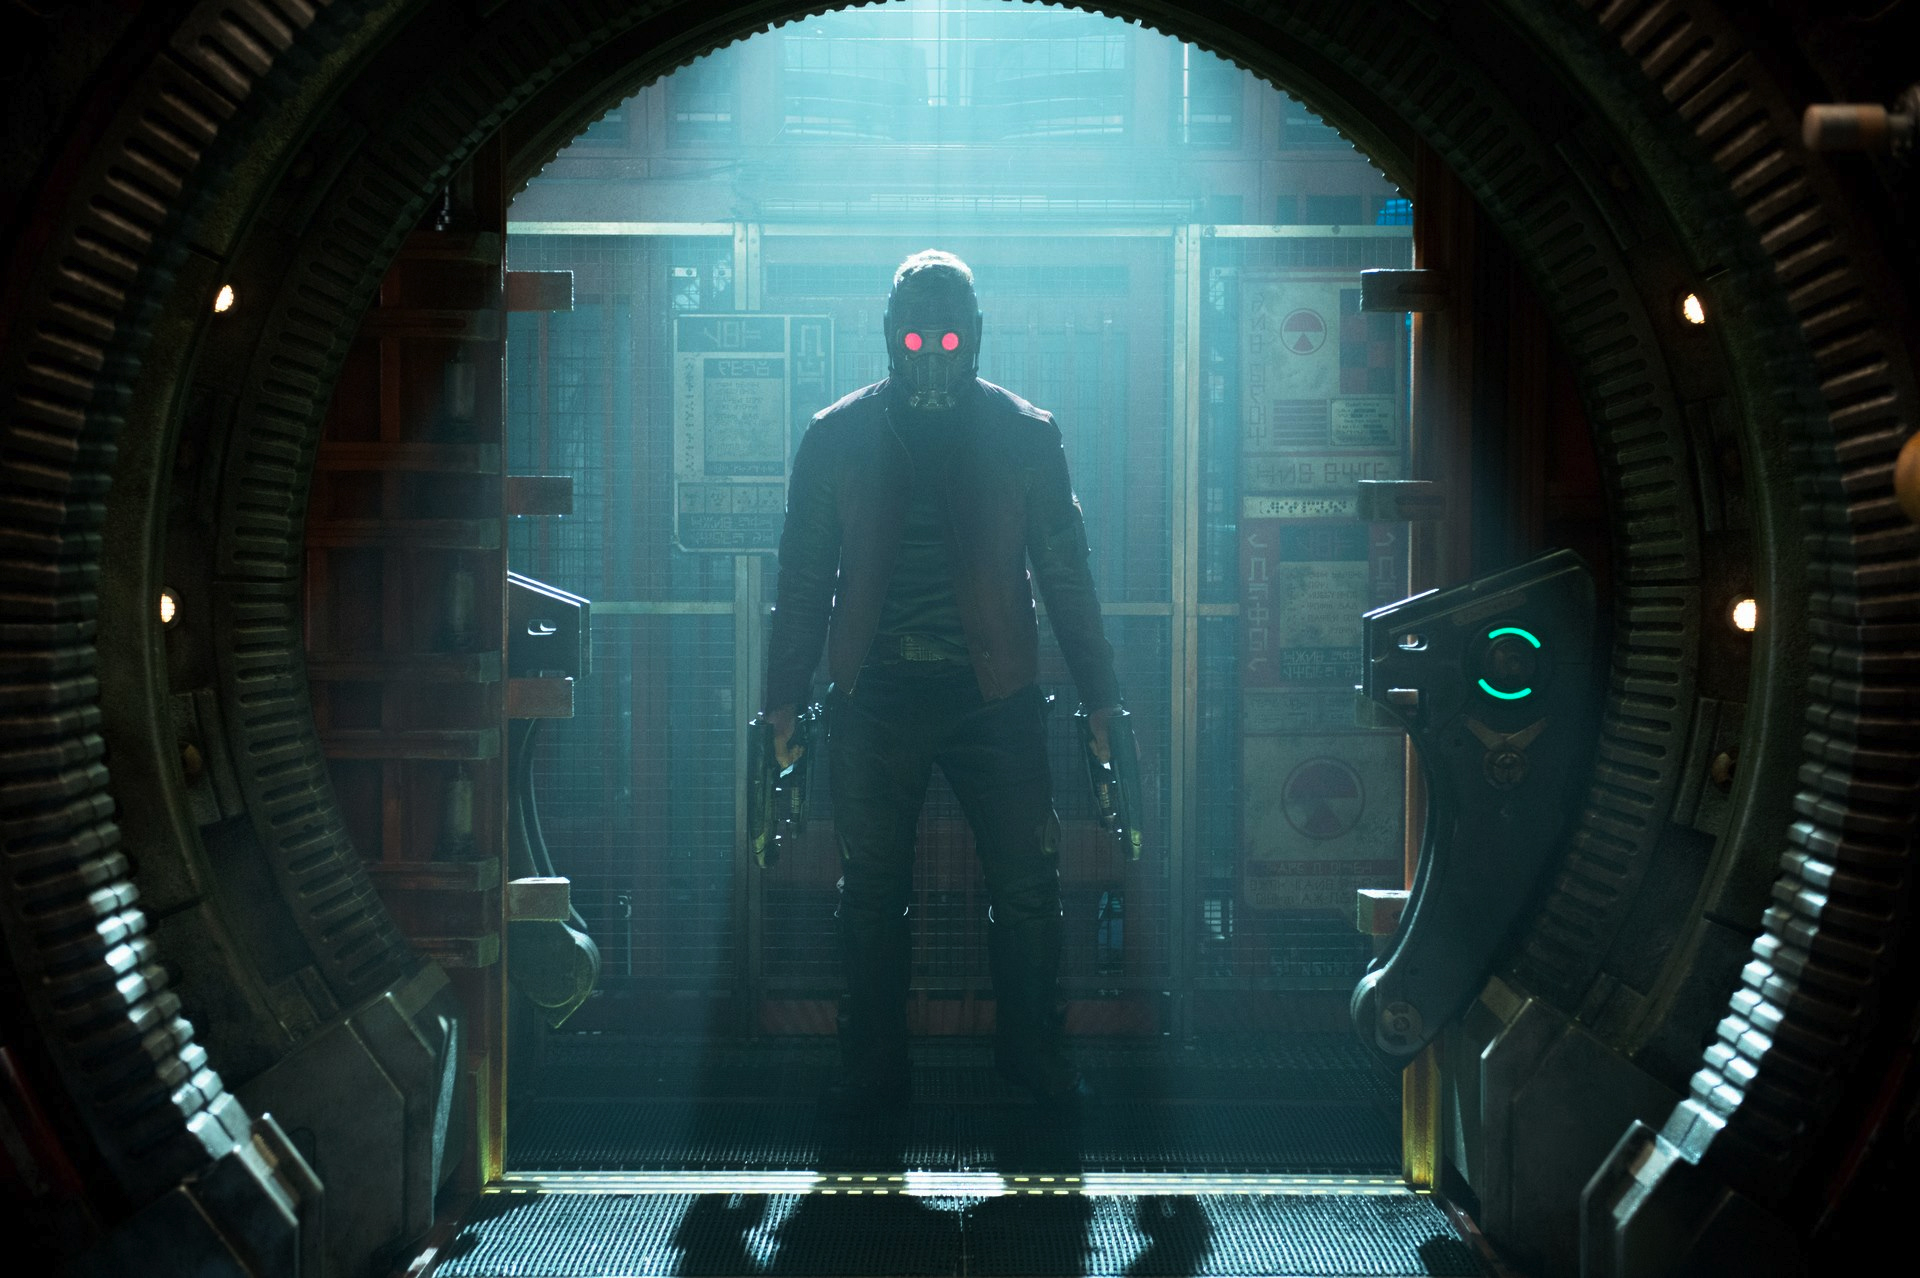
Chris Pratt as Star-Lord in Guardians of the Galaxy (2014) [source]

JD's near-complete Star-Lord sling bag, with weathering in its early stages.

The buckle 3D print [source: @IdiotEngine]

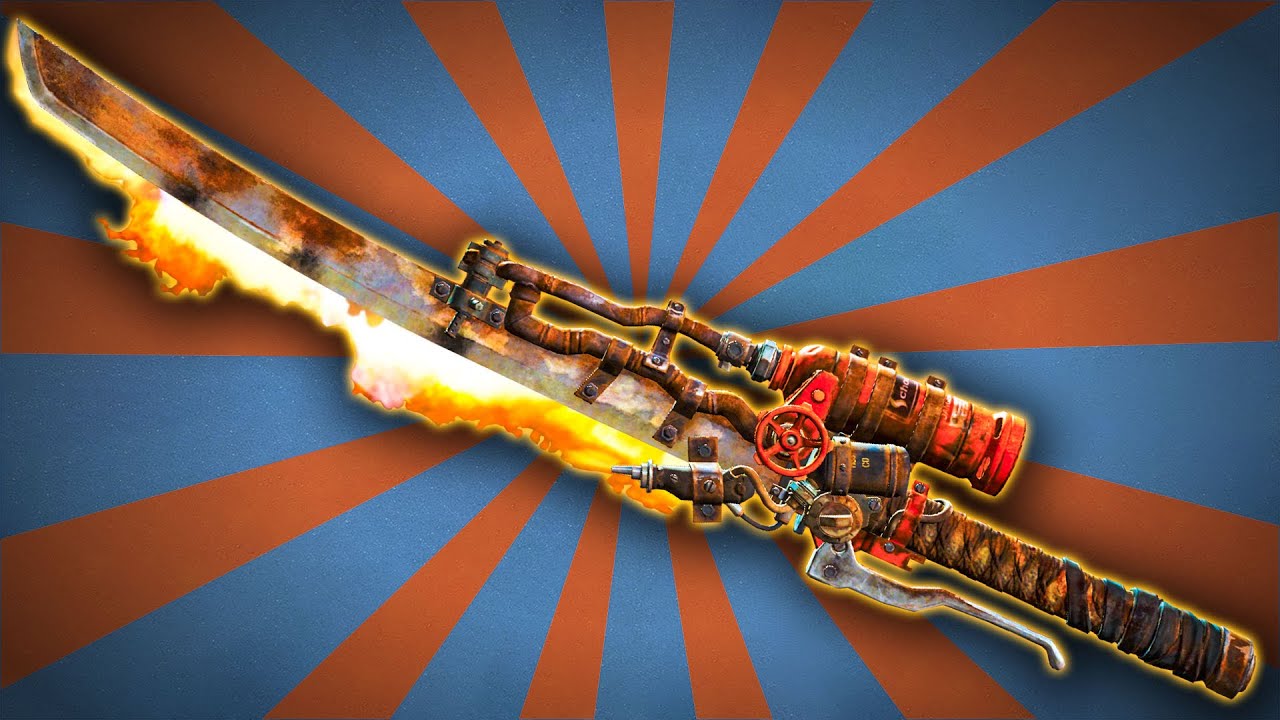
A bigger project for IdiotEngine may likely be 3D modelling Fallout 4's brutal fiery sword weapon, the Shishkebab, for JD to 3D print and do all the rest of the hard work with. I think you'll agree this sounds flaming awesome! sorry, couldn't resist! :L

A fire-starting Fallout 4 weapon that would make even The Prodigy happy [source]

Thursday, 8 December 2016

The Sad Robot, How it Came to Be

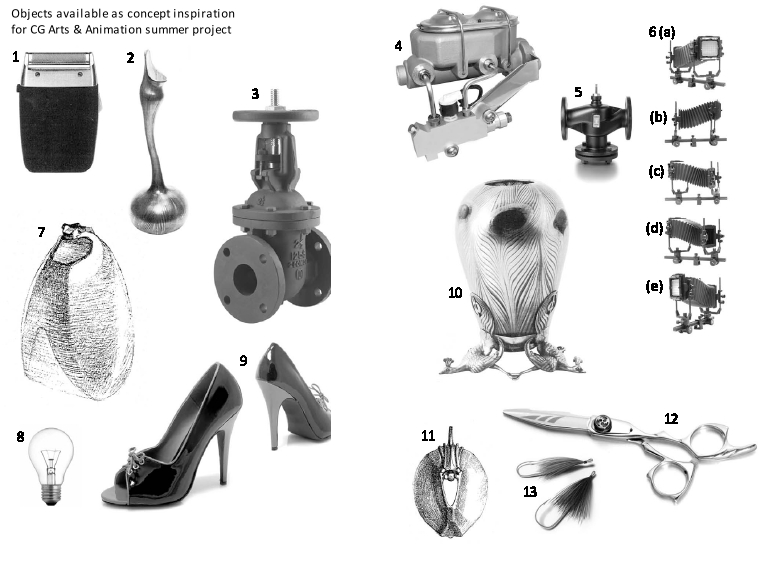
Back in the summer of 2013, fresh out of college and having chosen UCA's CG Arts & Animation course (now known as Computer Animation Arts) as my go-to destination for University, our course leader-to-be set us the task of adapting 13 random objects (Fig. 2) into 100 concepts, before translating 3 of those concepts into orthographic projections of a machine, life-form and a structure; concepts 24, 88 and 41 respectively. Looking back I remember worrying over getting all 100 sketches done, but once I got into it I was well on my way to 101. Wow, 19 year old me stressing over 100 thumbnail sketches, oh how little I knew back then!

Roll forward 3 years to post-graduation, looking for inspiration I decided I'd use my improved graphic design and 3D modelling skills to turn some of these hand drawn sketches into clean orthographics, and finally a working 3D model.  The aim is to build the robot to work like machine, one that that can be rigged and manoeuvred appropriately. In my next progress update I will be publishing screenshots of the digital orthographic development and modelling process up to this point.

Fig. 1: 3 years in the making, 1 & 0 (on & off)

Fig. 2: The original objects

Tuesday, 5 July 2016

[ND16] 17: The Art of Elements Academy; Re-Upload

For unknown reasons my original Art Of upload on Scribd can not be accessed on the website, claiming that this document has been removed from Scribd, even though it is accessible when I'm signed in to the website, meaning other people are unable to embed it. The same problem occurs when I re-upload a new version, so I've uploaded it with Google Docs instead.


The embed code is: 

<iframe src="https://drive.google.com/file/d/0B6IRjigAdvGFaG1iVHUxMVdSdTQ/preview" width="640" height="480"></iframe>


For this blog post I have changed the code's width value to "750", which automatically changes the height with it.

Wednesday, 29 June 2016

[Review] Render Farm: GarageFarm.net


GarageFarm is a render farm first recommended to us by Phil, one that has proven extremely worth it for all those of us who have used it. The staff are helpful and approachable, as well as easy to access when you need help, all it takes is a single click of the speech bubble icon; there are staff on hand 24/7, so you don't need to fear if you need to render quickly in the middle of the night --which is pretty much an animator's rite of passage!-- and don't know what to do. 


Even if a real person wasn't on hand, they have various video tutorials and a forum to help you find answers. Like any new software, figuring out how to set things up can be confusing at first, but once you know how to do it, it becomes really straightforward. In order to send off your renders you have to first create an account & download their Render Beamer, which is available for Mac and PC - once downloaded you can access this via Maya's new renderBeamer shelf. 

Unfortunately we are currently unable to download the Render Beamer on the University computers because of limited download permissions, but once the render has been sent off via a home computer you can keep track of its progress on the website. The Web Manager is well designed and shows you the progress of your render, while also listing its cost in dollars. GarageFarm has a price calculator that lets you figure out how much your renders are going to cost, before you even have to jump in at the deep end.


Using GarageFarm is extremely worth it because the render turnaround time is quick, their pricing is transparent and it gives you a lot of extra time to spend on other aspects of your project. You even have the option of rendering your scenes with different levels of priority, depending how desperately quickly you want to receive your finished renders.

Two small nuggets of advice, before sending off a file to the farm make sure you tick Apply Output Transform to Renderer under Color Management in the Common tab of your Render Settings, otherwise your images wont render with colour management applied. Finally if the renderBeamer icon randomly vanishes from your shelf, you can bring it up with this bit of Python script...

from mayaBeamer import main
reload(main)

main.run()

Just paste it into your Script Editor under the Python tab, highlight the text, press the play icon and you're golden :) Good luck and may getting your work rendered never be stressful again!